Navigate to the Campaign Creation Page
The first step is to navigate from the main dashboard to the campaign creation section.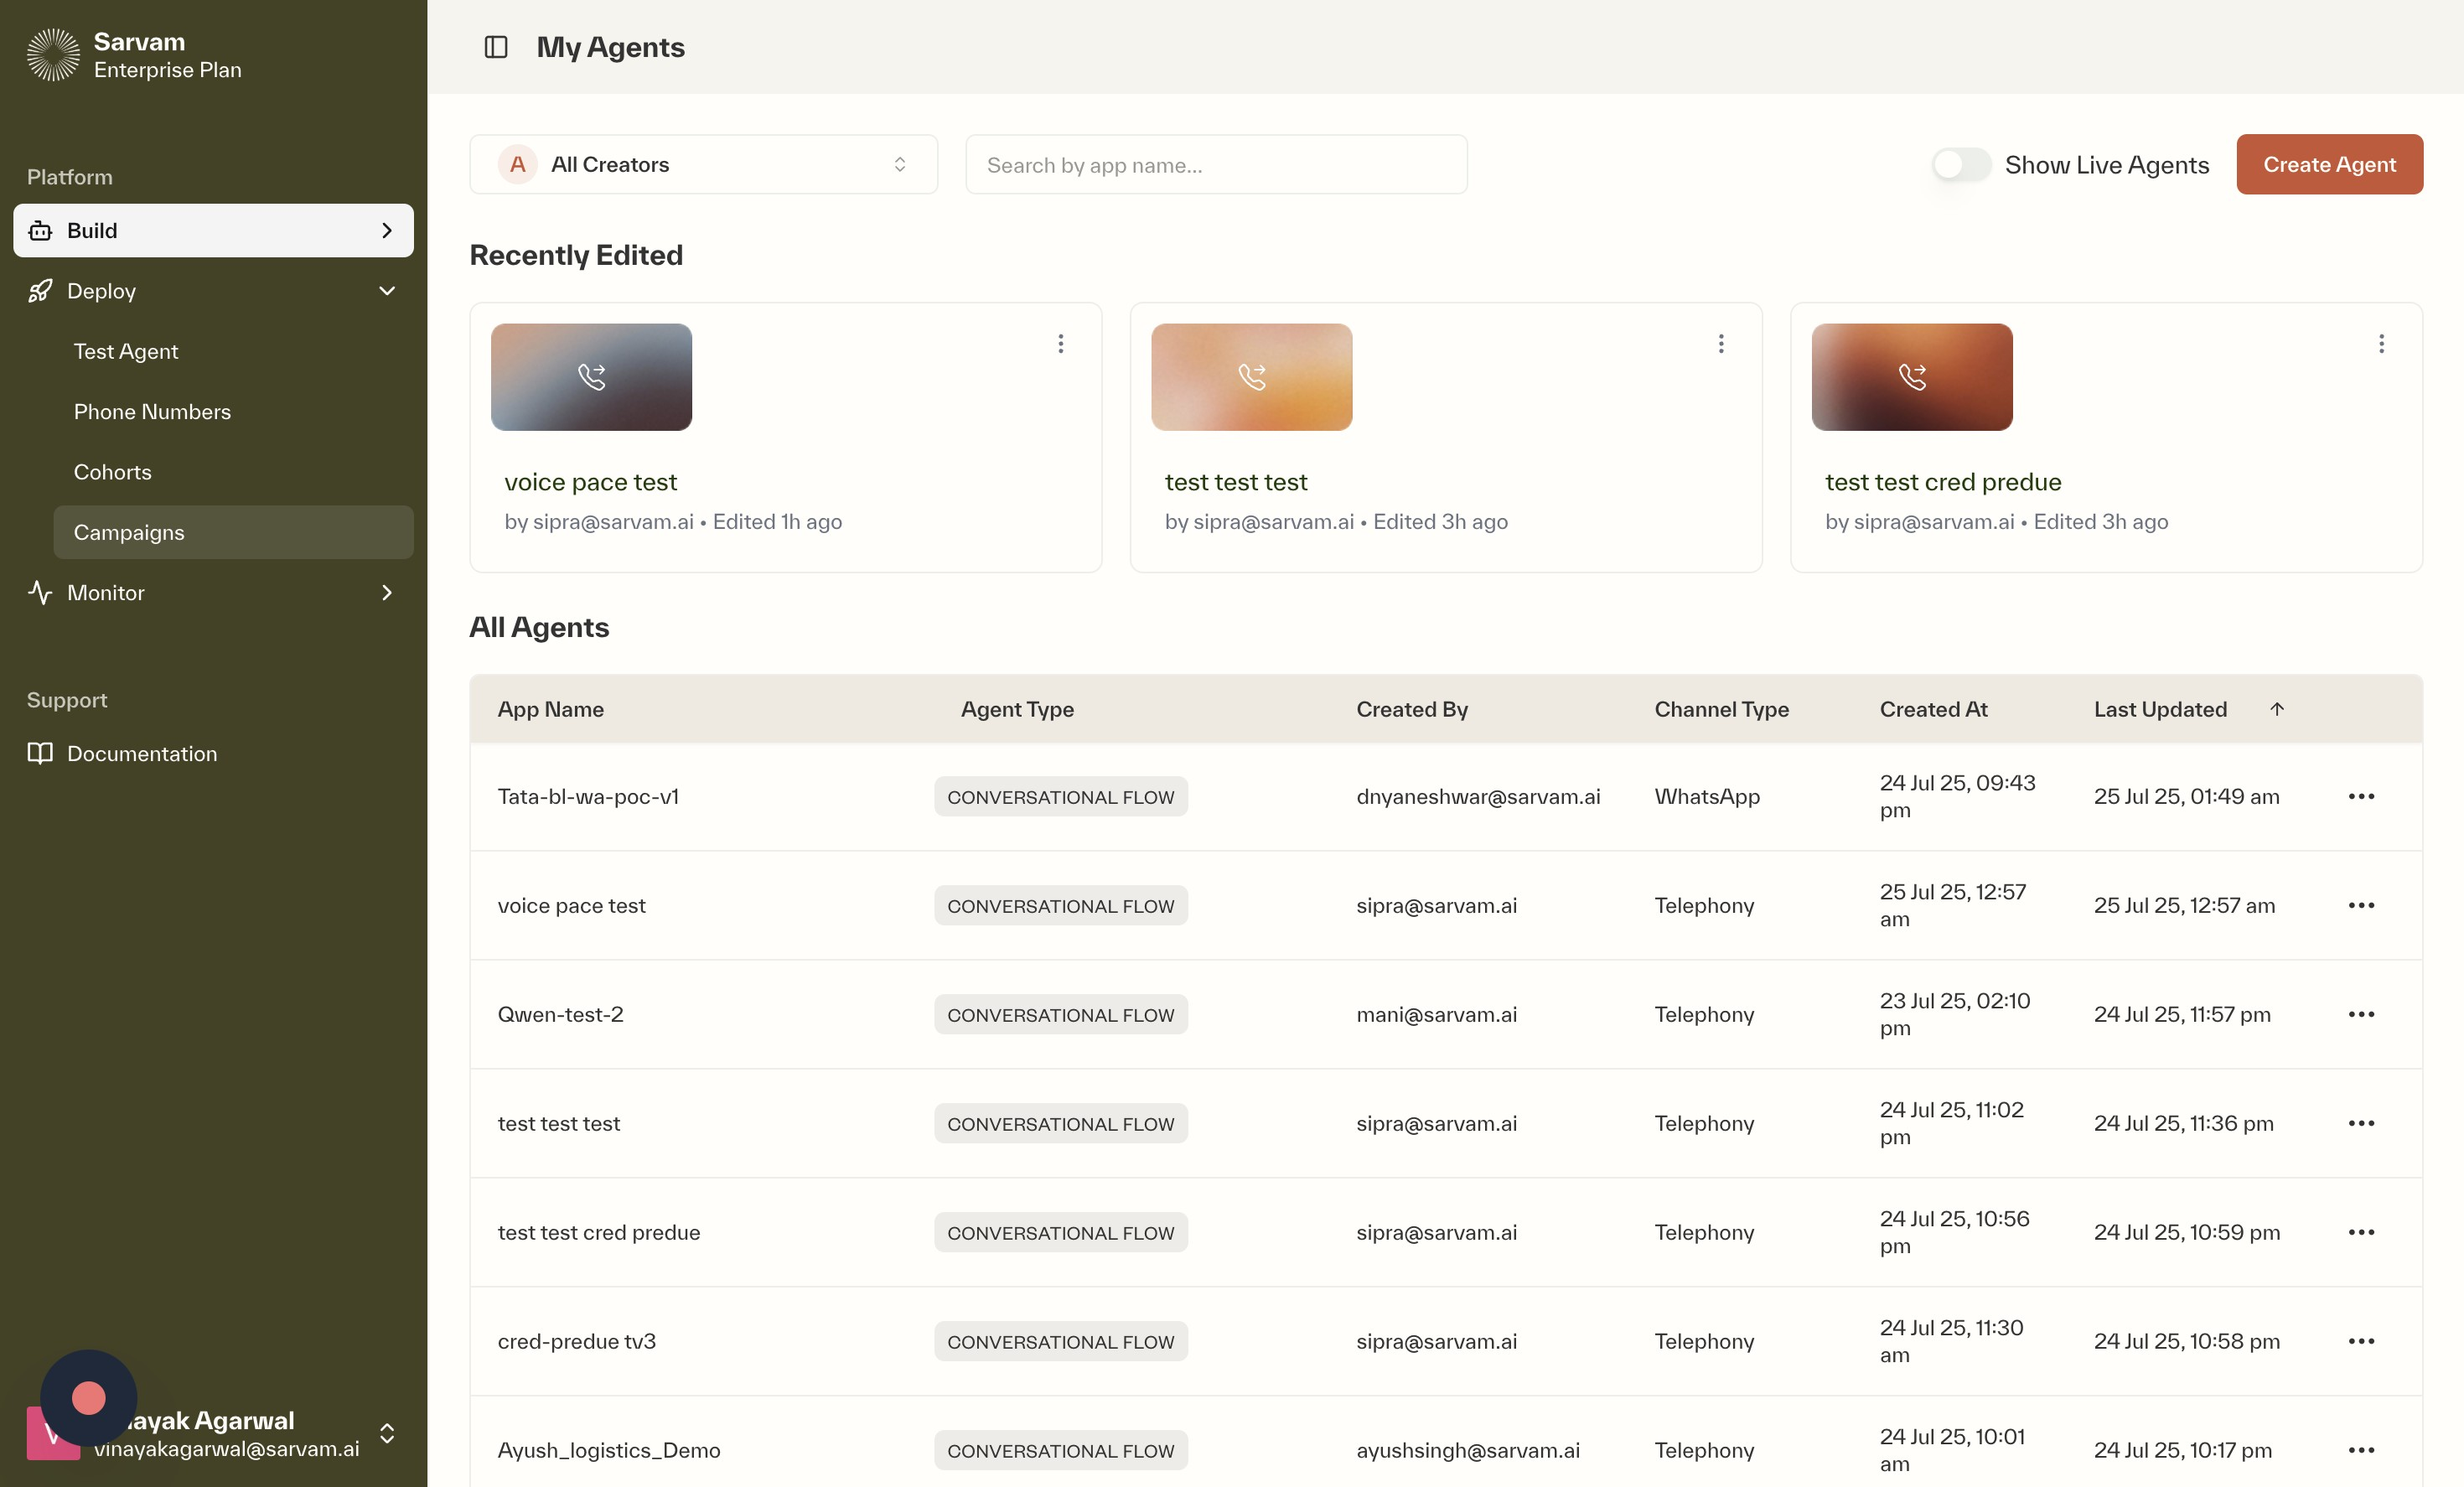

- From the “All Agents” Page, Navigate to Campaigns: The initial view shows a list of all created agents. On the left-hand navigation menu, under the “Deploy” section, click on “Campaigns” to proceed.
- Create a New Campaign using the Smart Scheduler: You will now see the main “Campaigns” page. To start a new campaign, click on the “Smart Scheduler” button.
Step 1: Agent Details
This section involves selecting the agent for the campaign and giving it a unique name and description.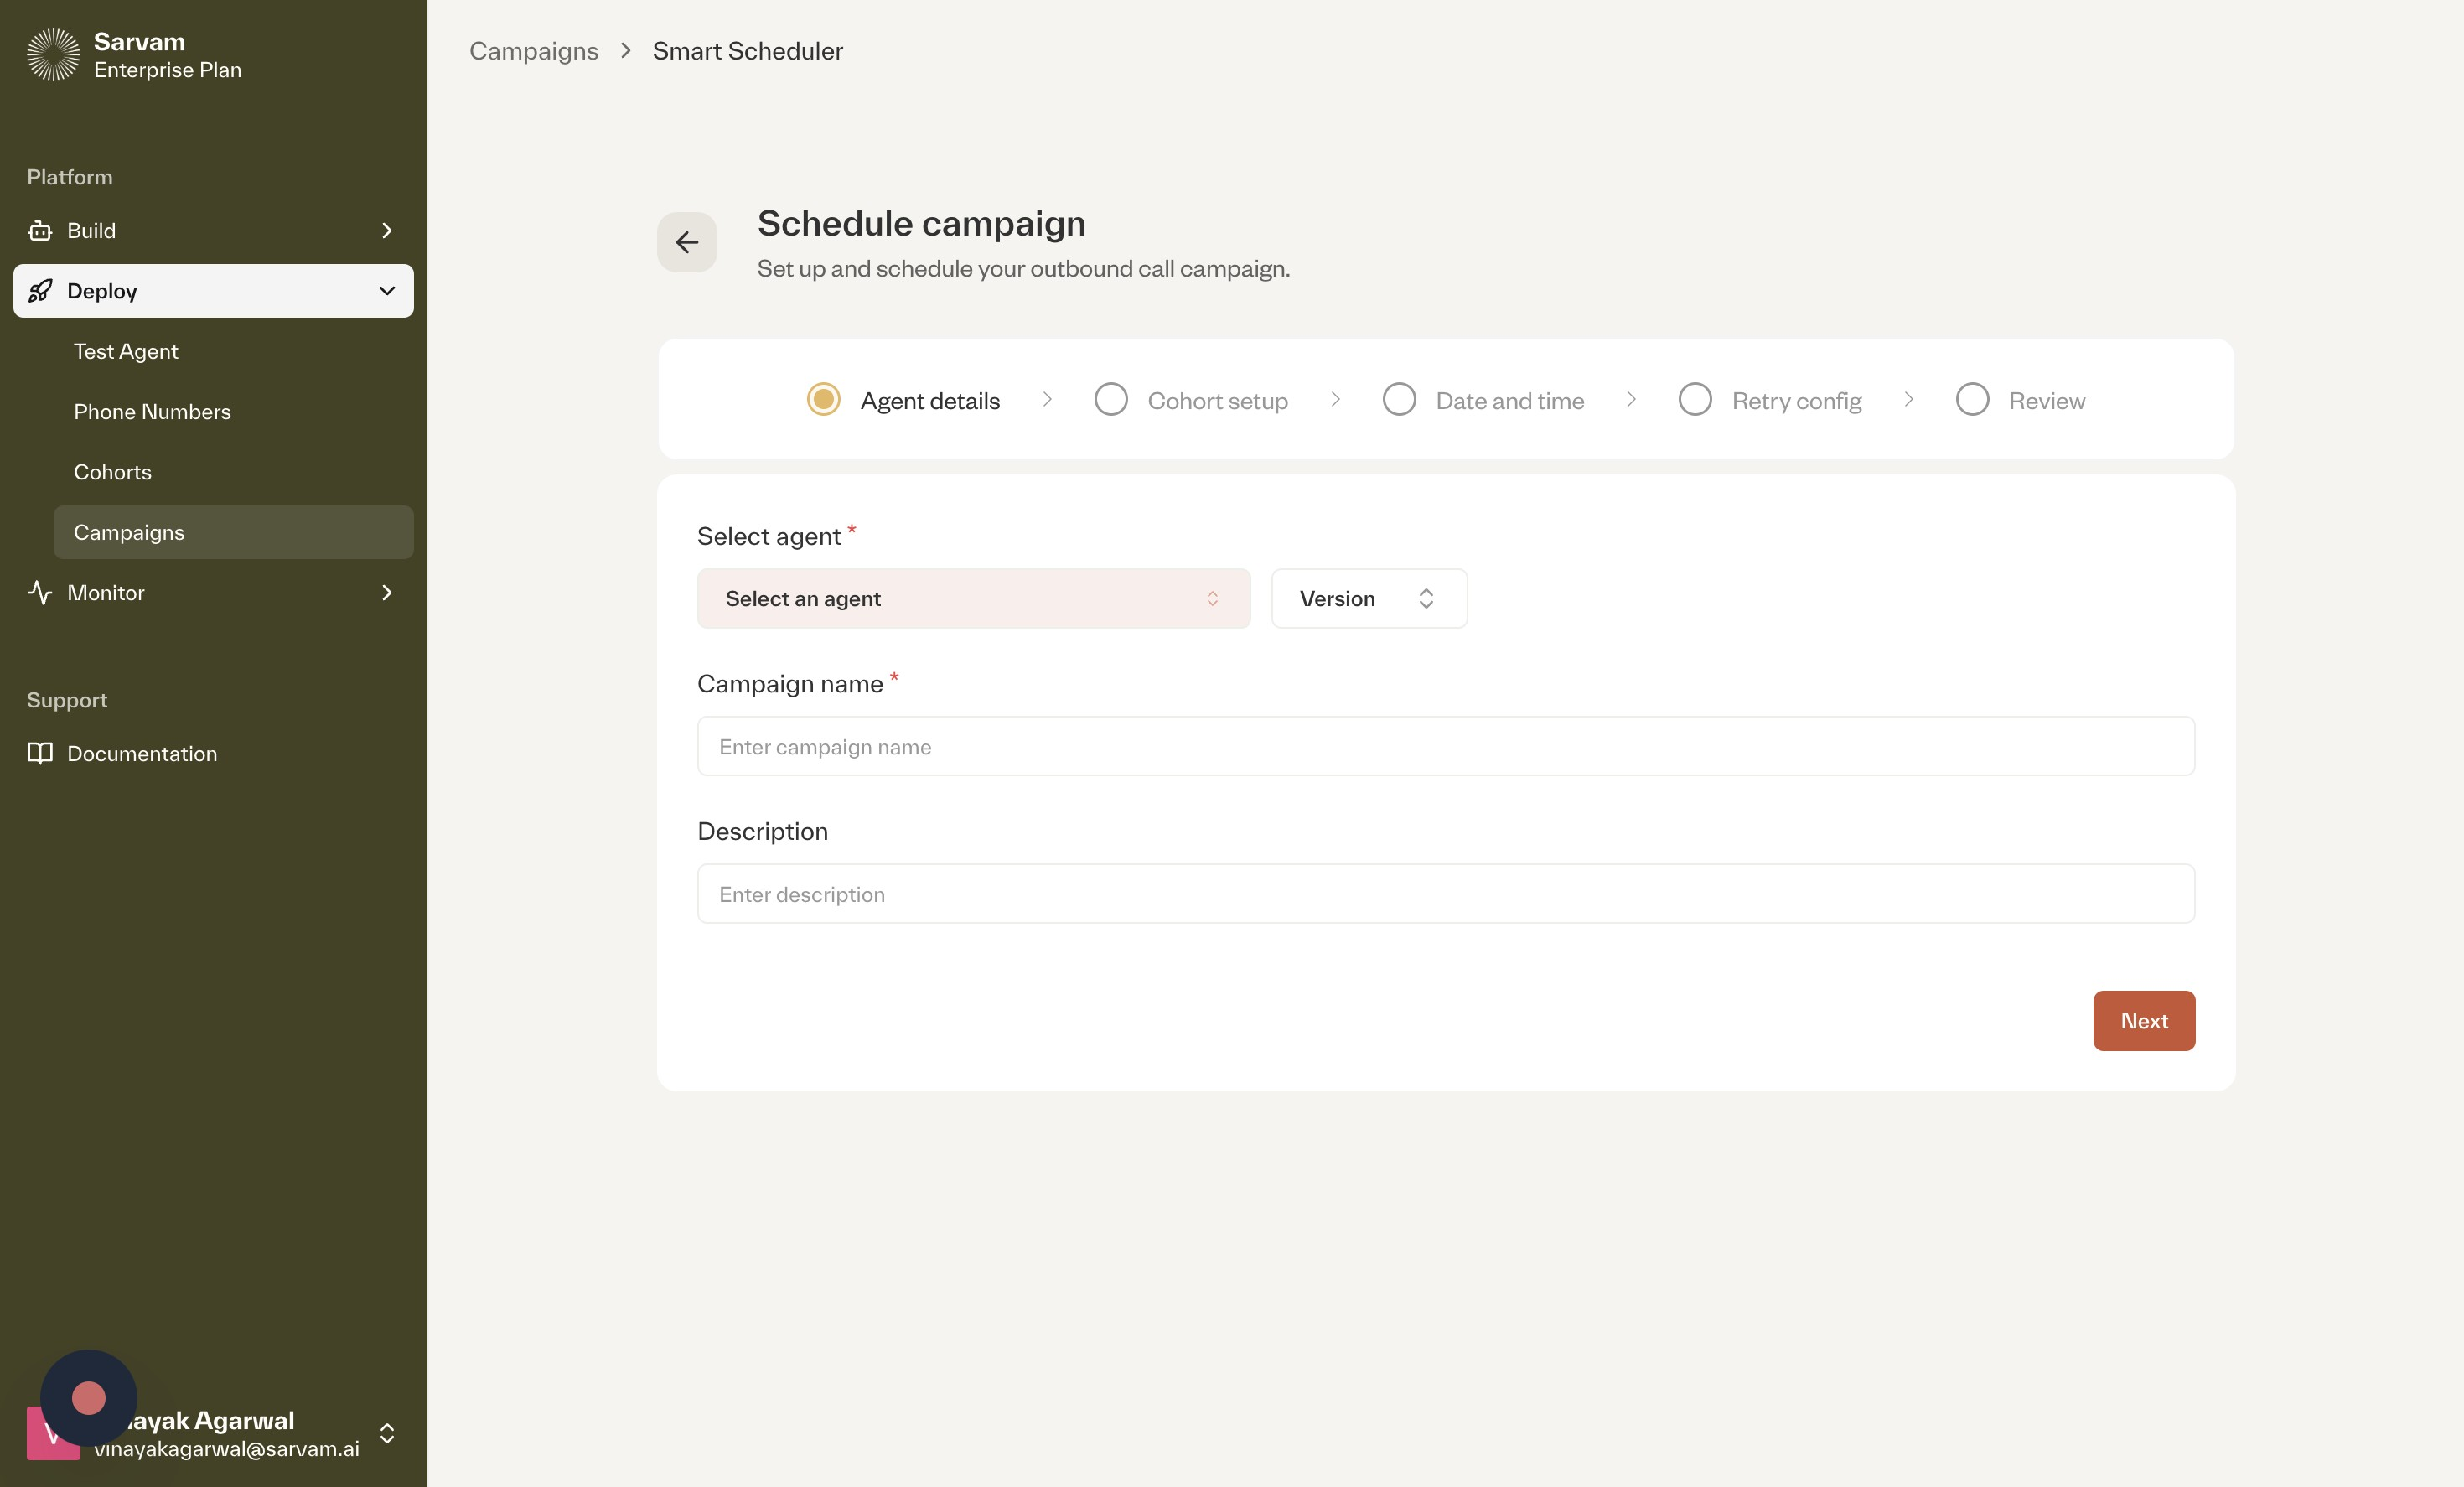
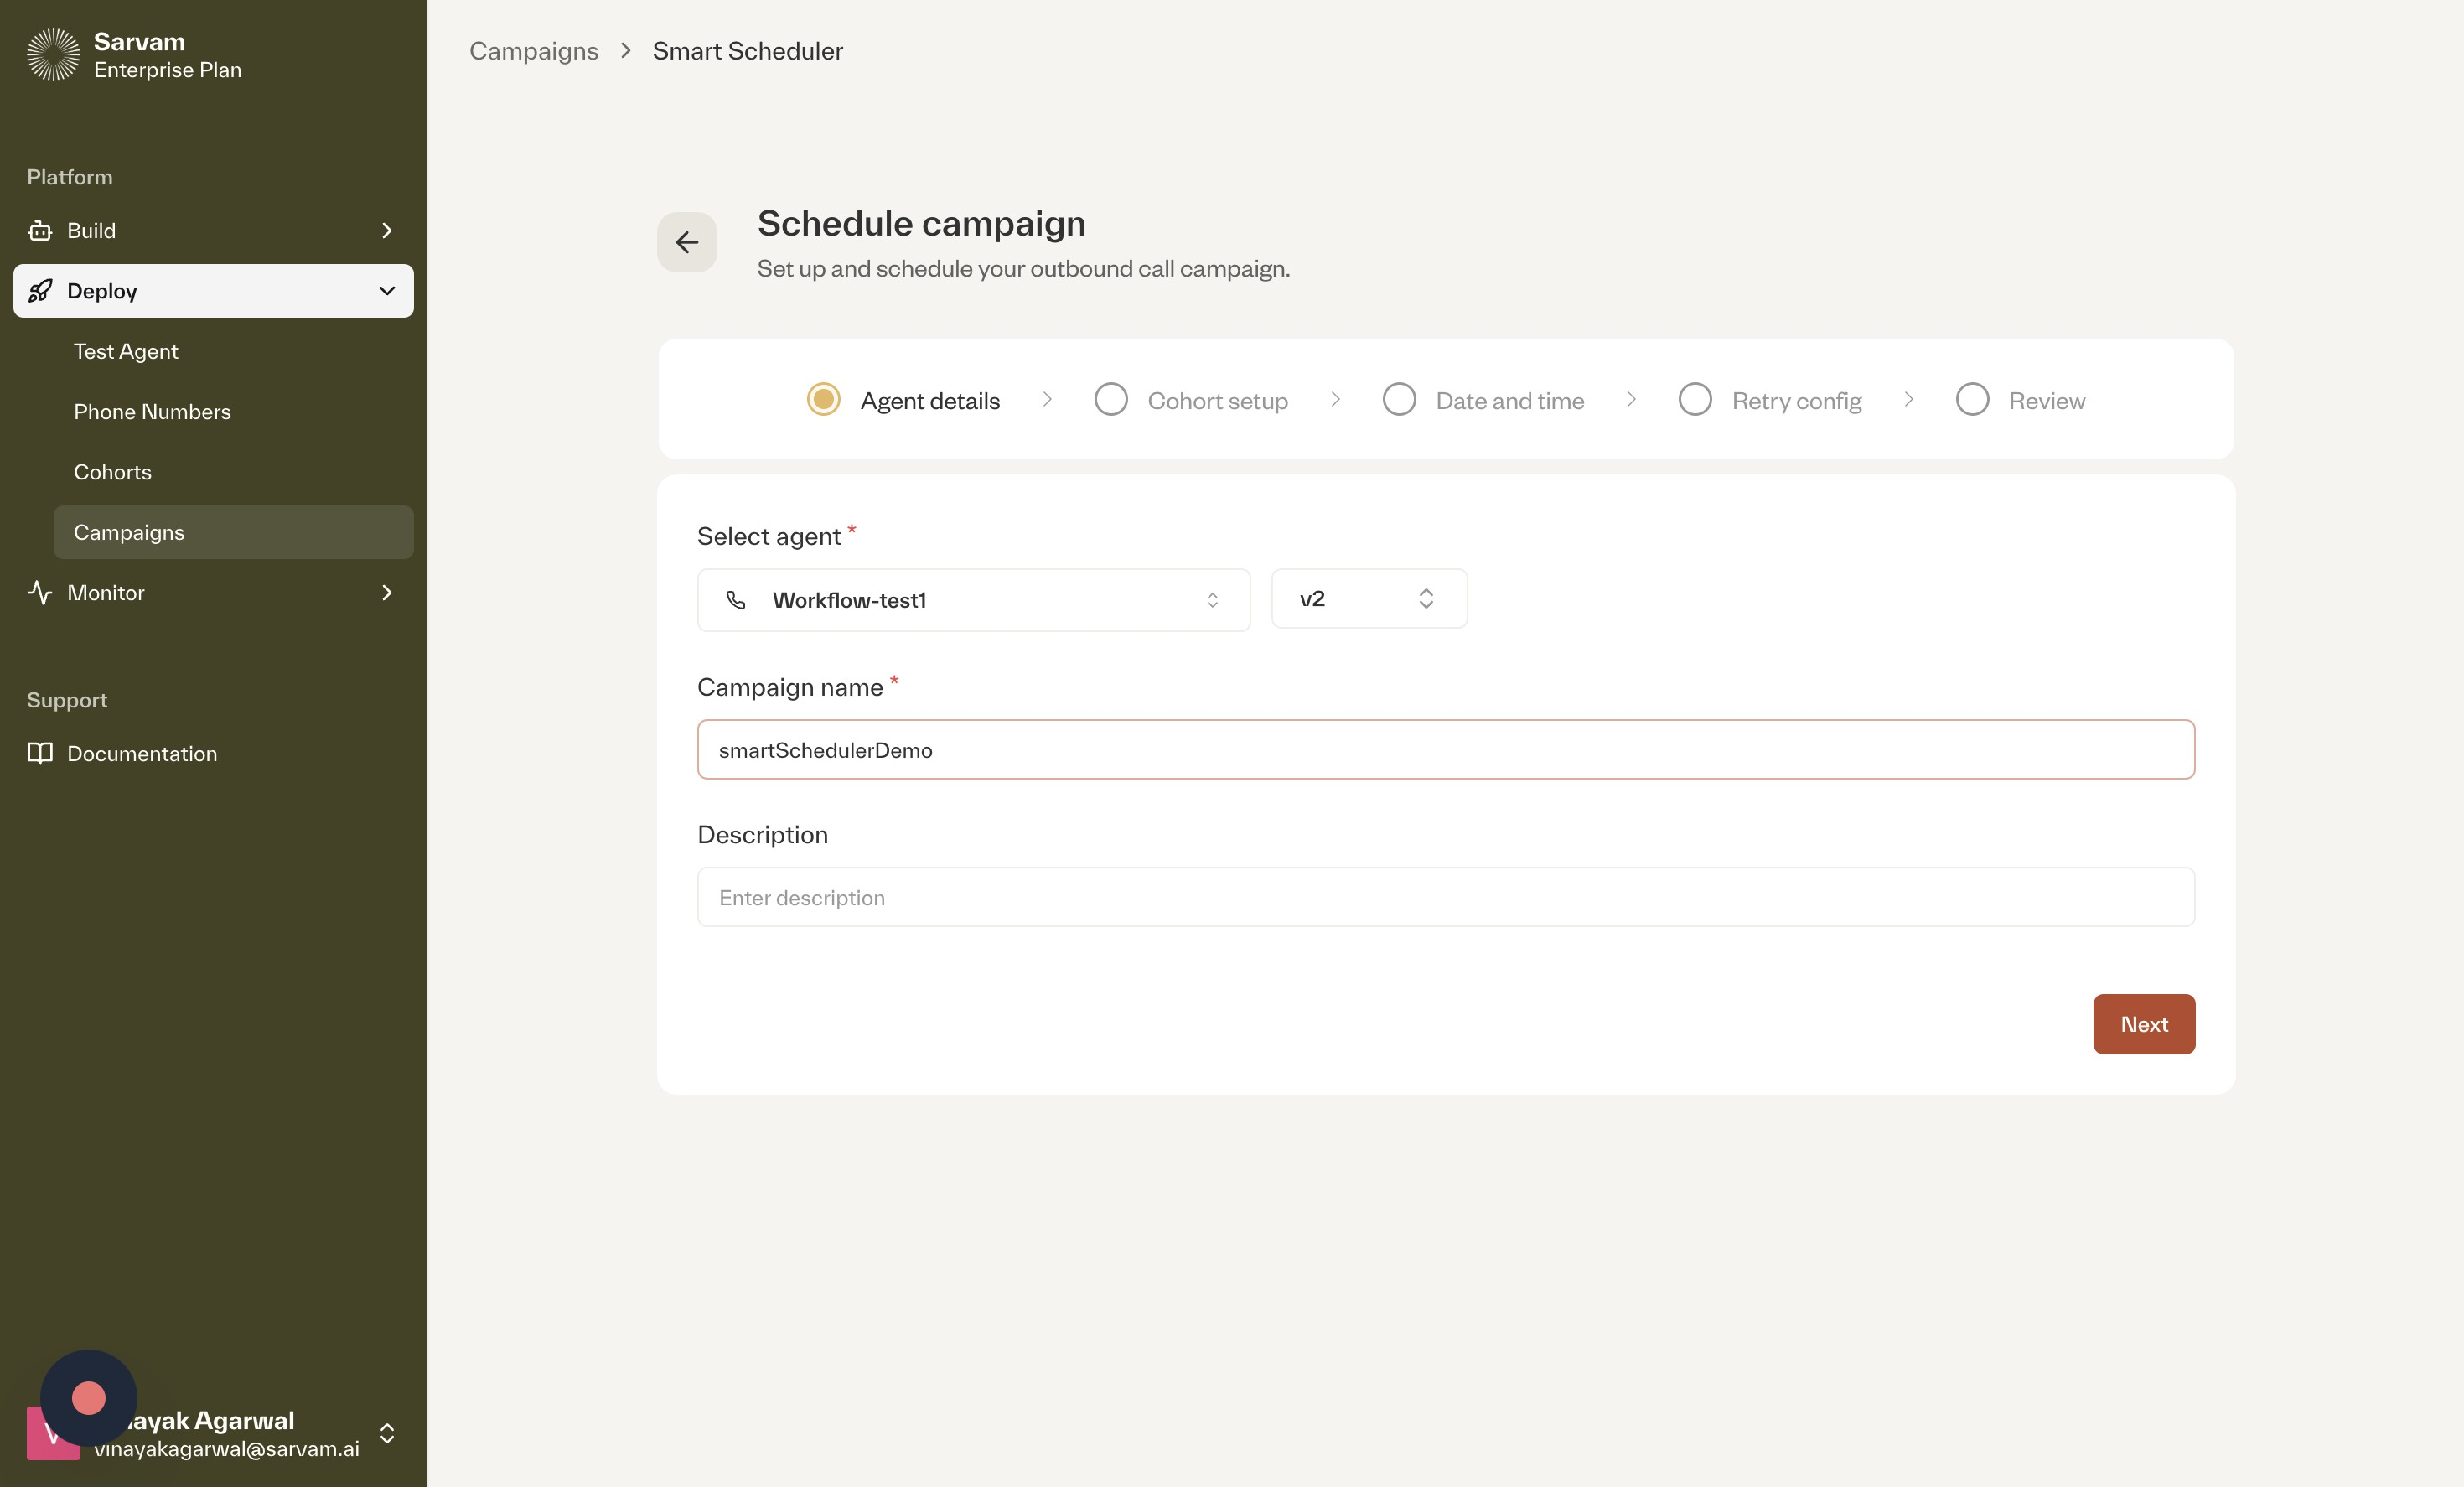
- Select an Agent: In the “Schedule campaign” window, click on the “Select an agent” dropdown menu to choose the conversational agent for this outbound campaign.
- Enter Campaign Name and Description: Provide a “Campaign name” for easy identification and add a “Description” to provide more context.
Step 2: Cohort Setup
Here, you will upload the list of contacts (cohort) that the voice bot will call.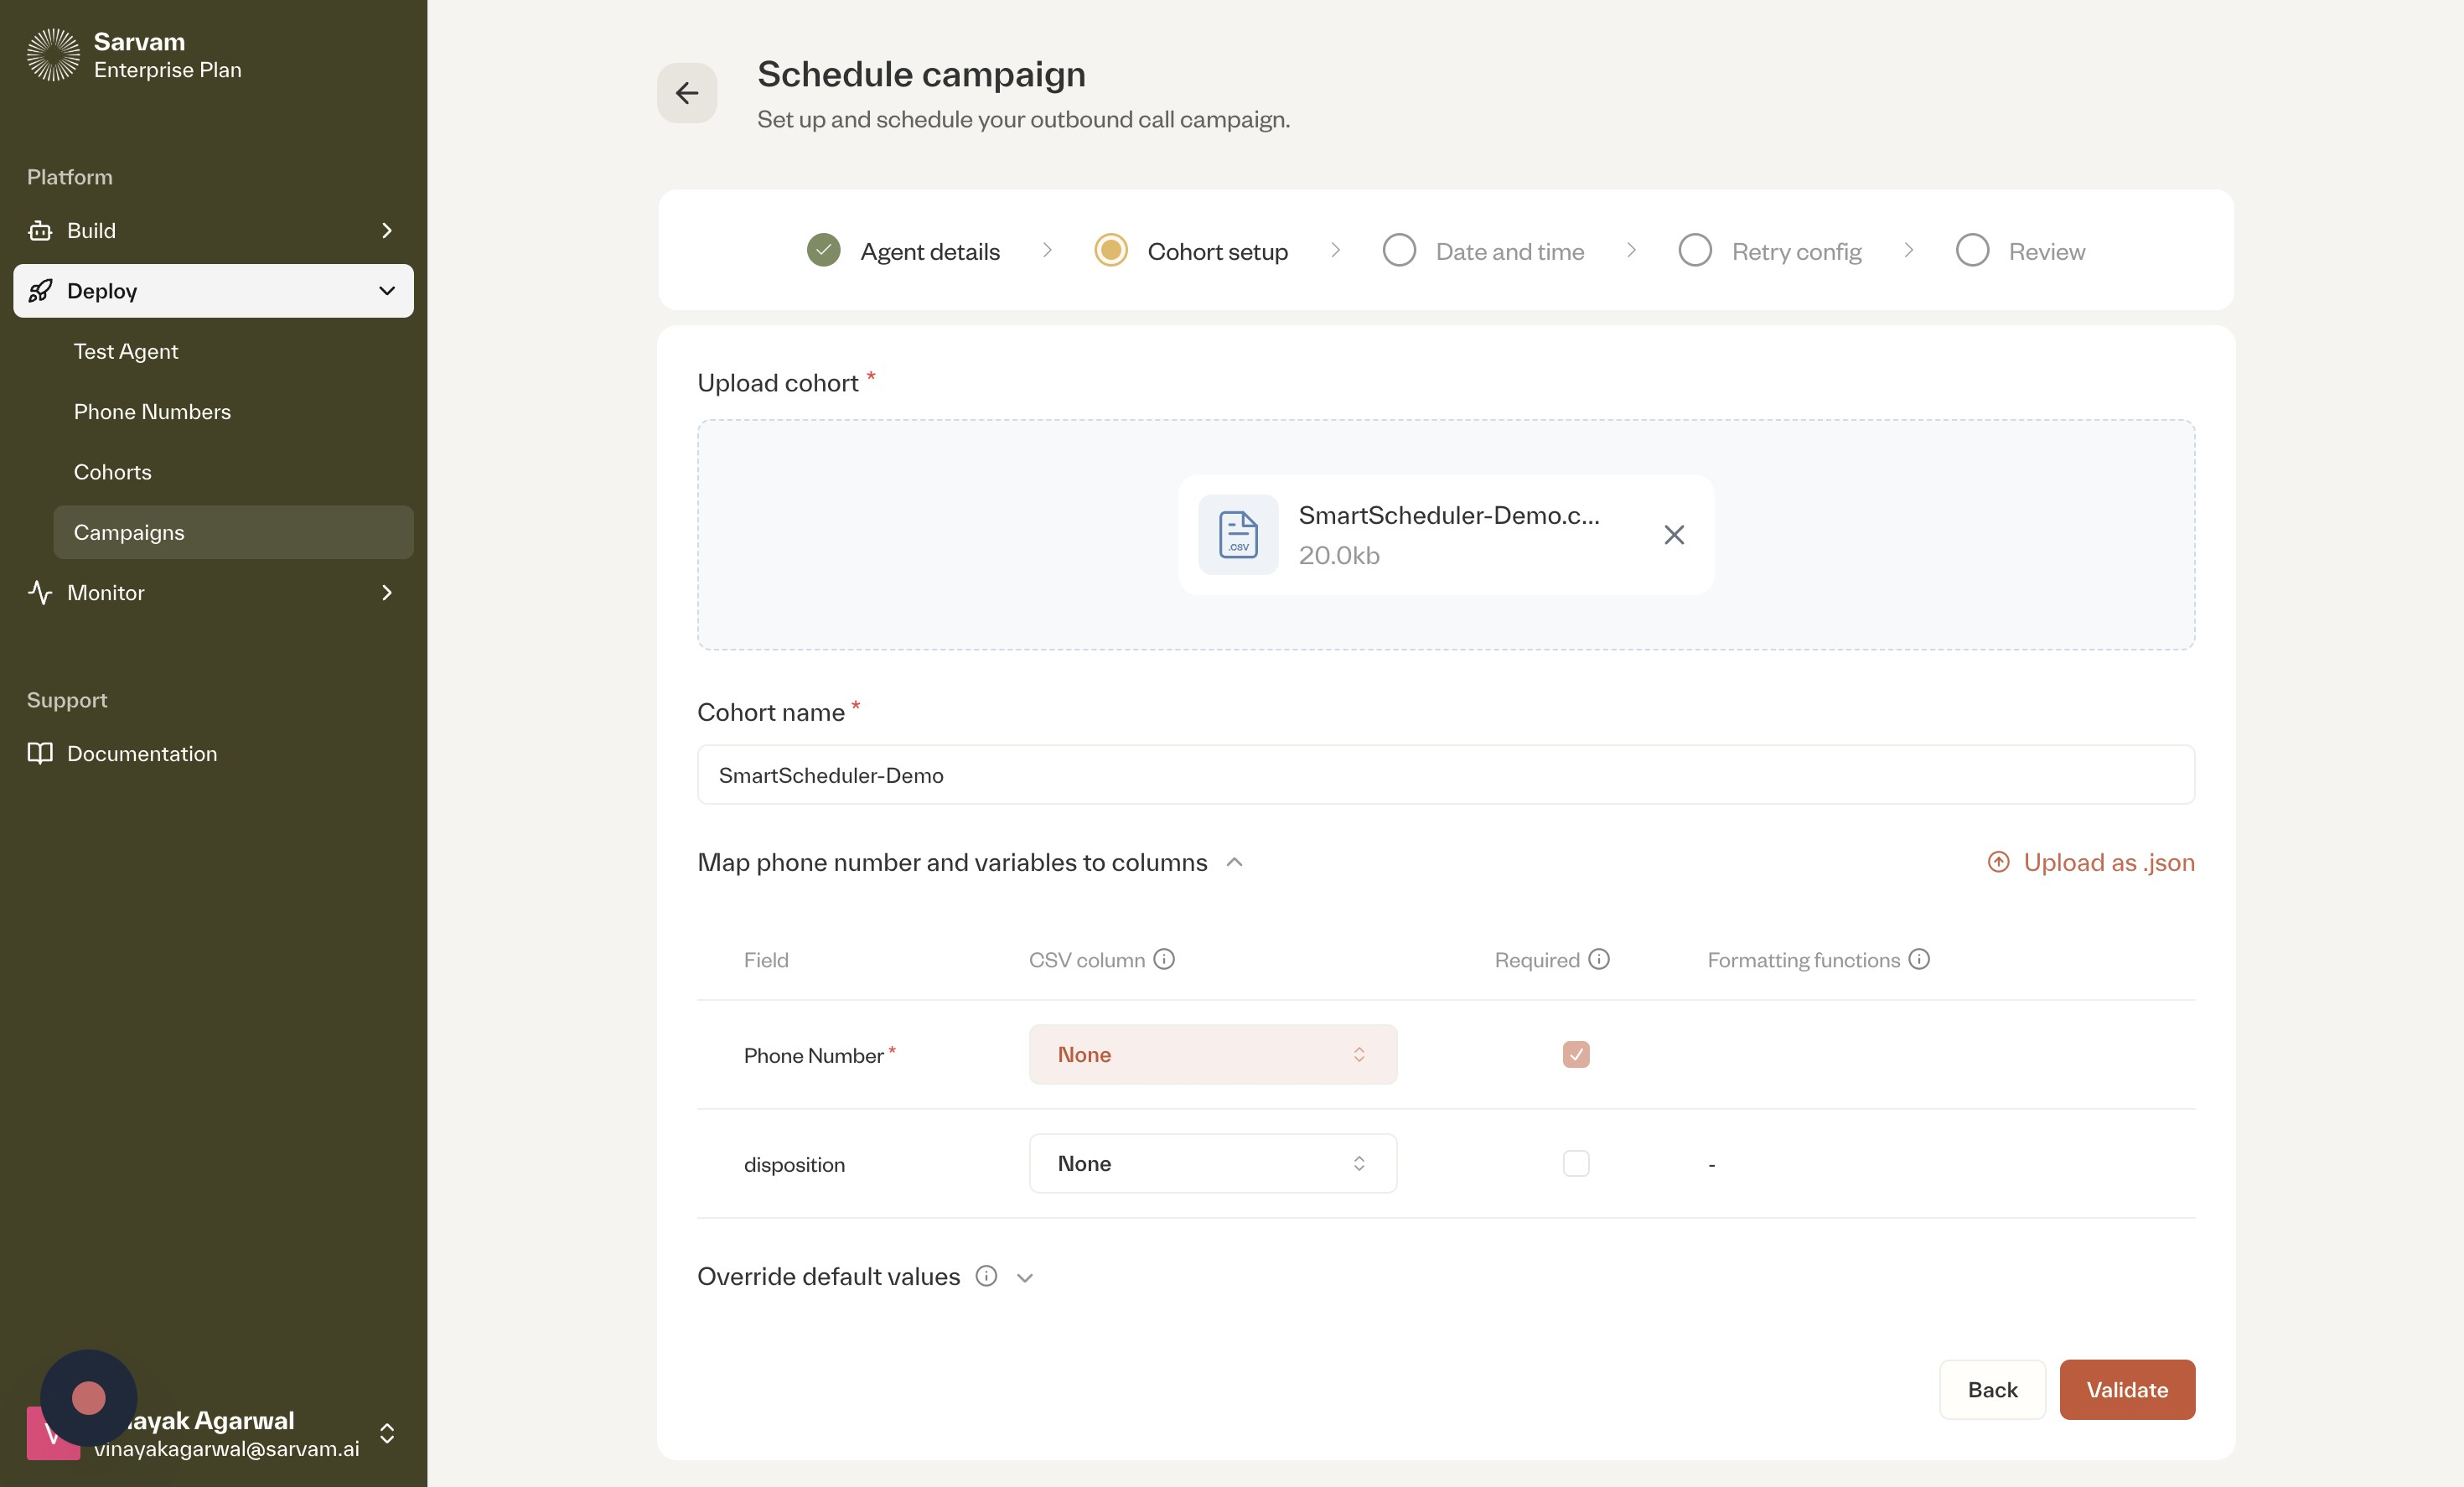
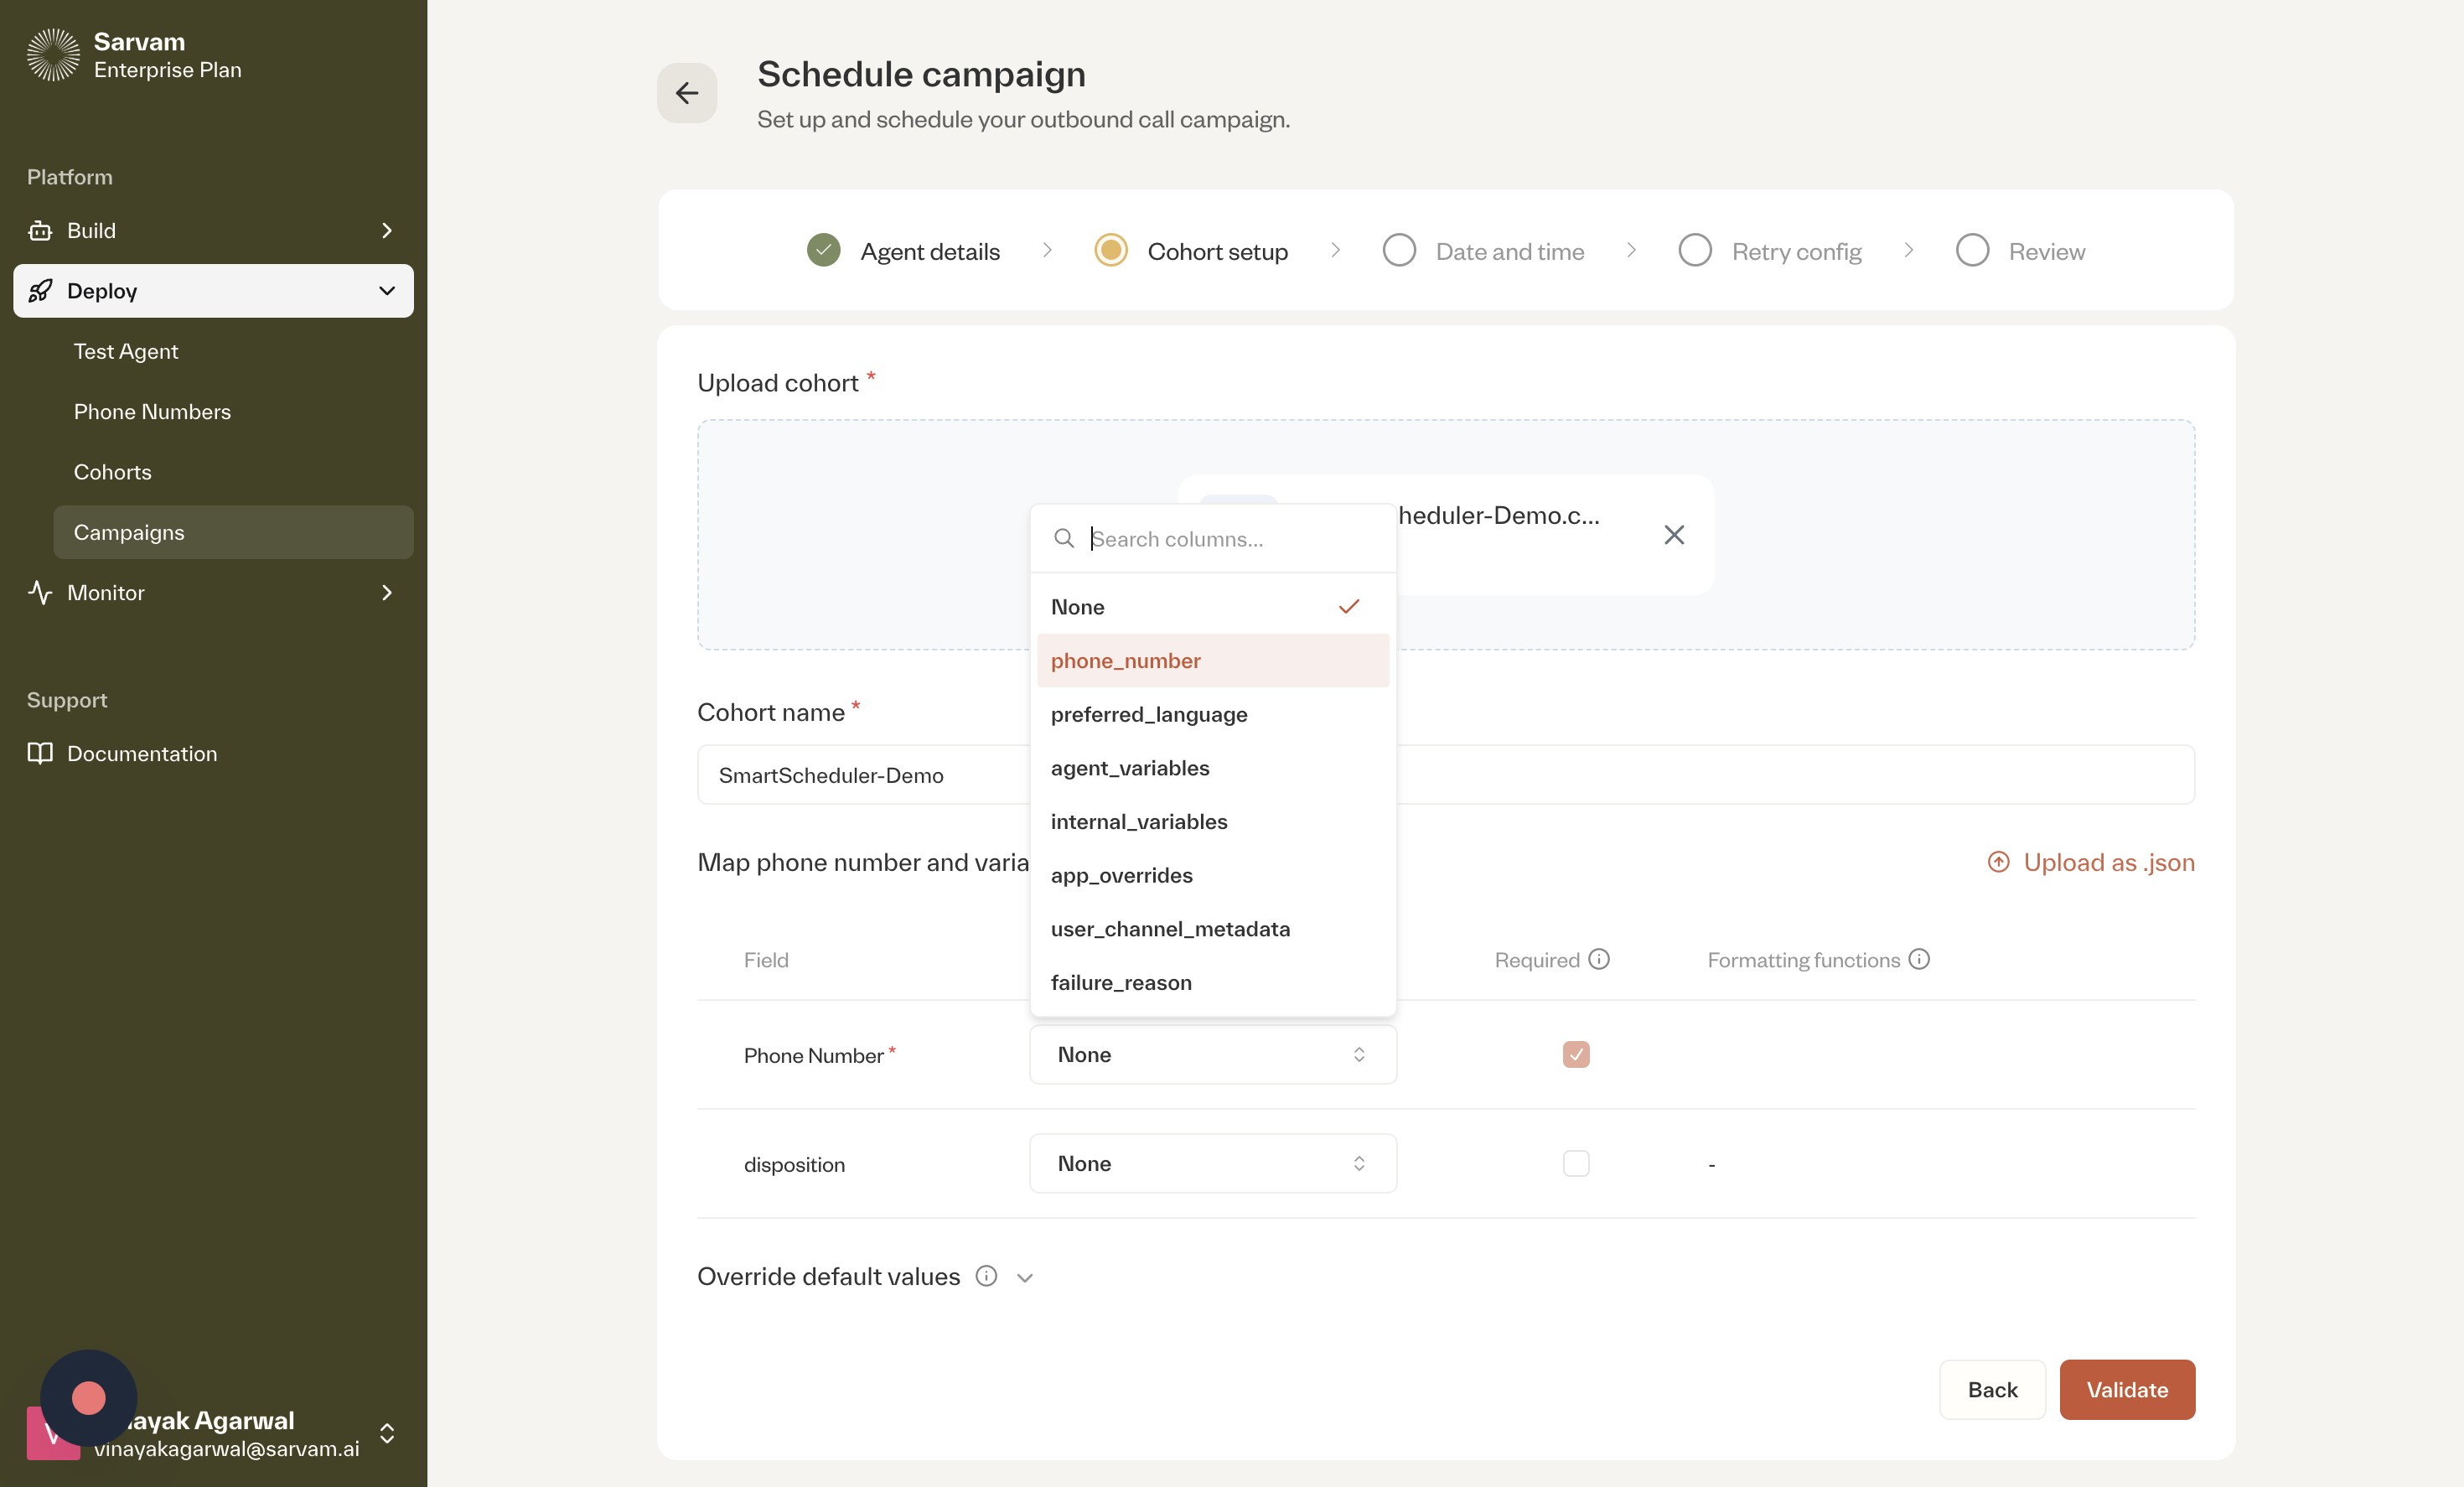
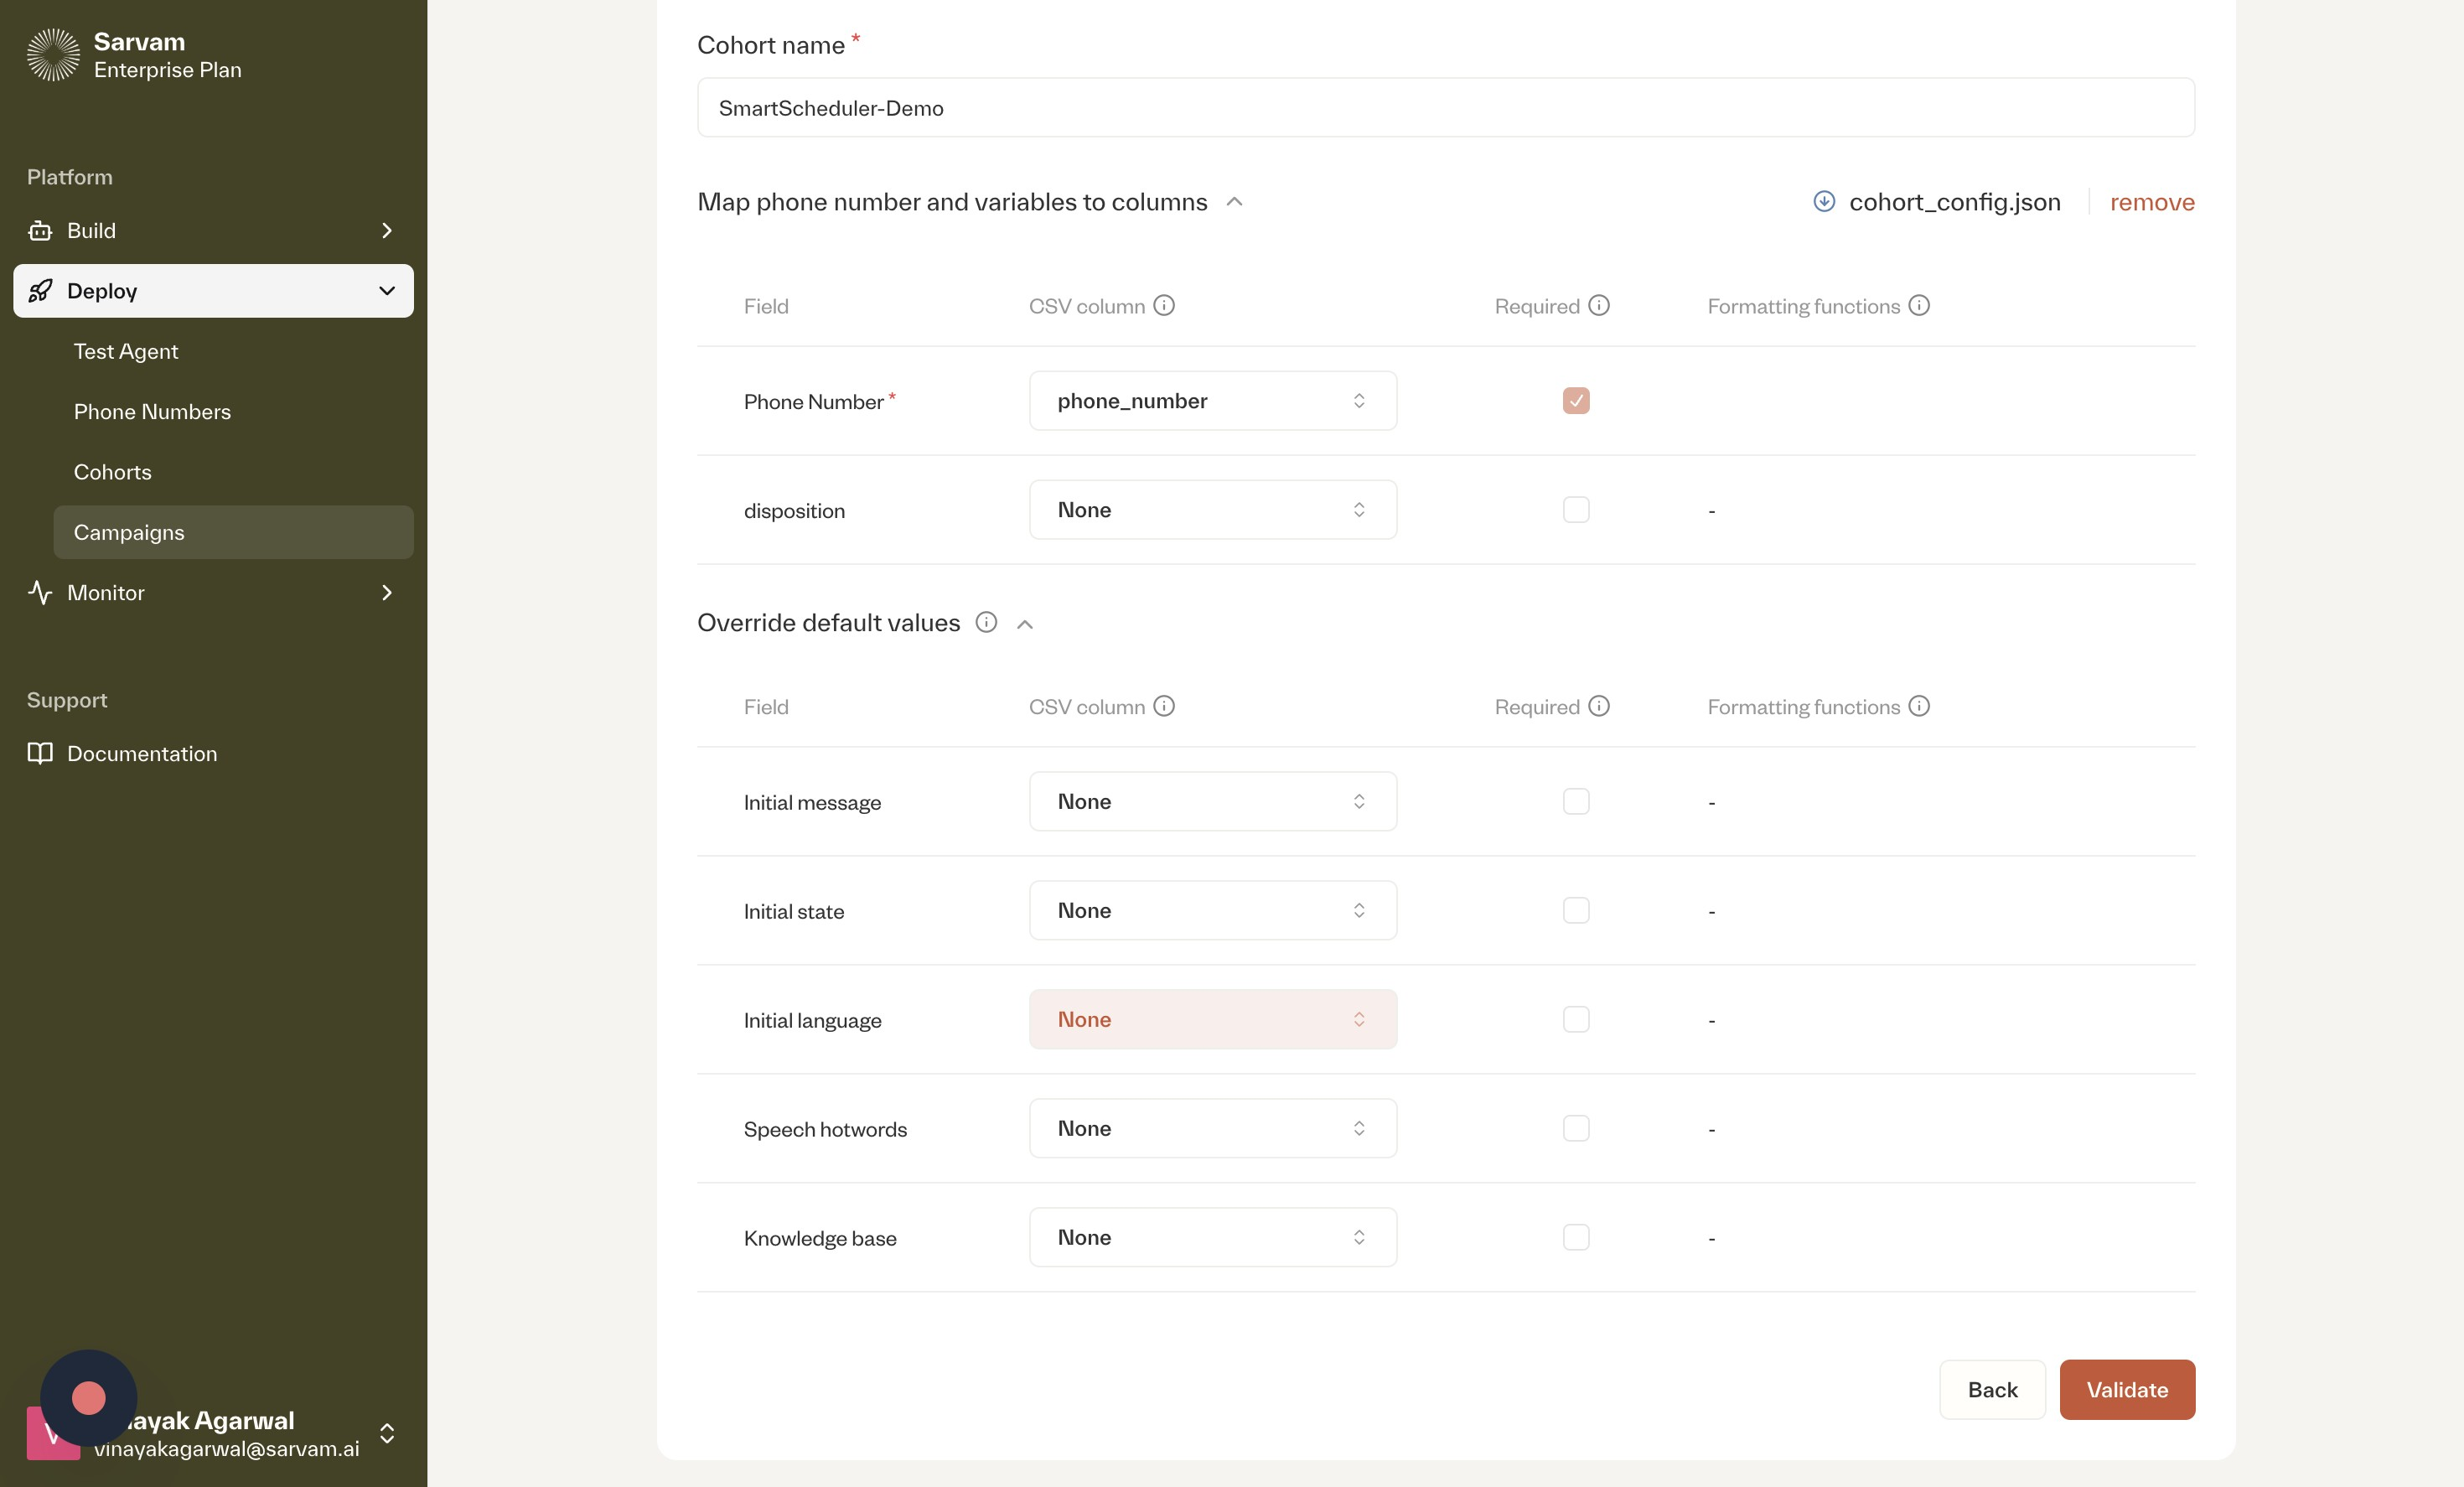
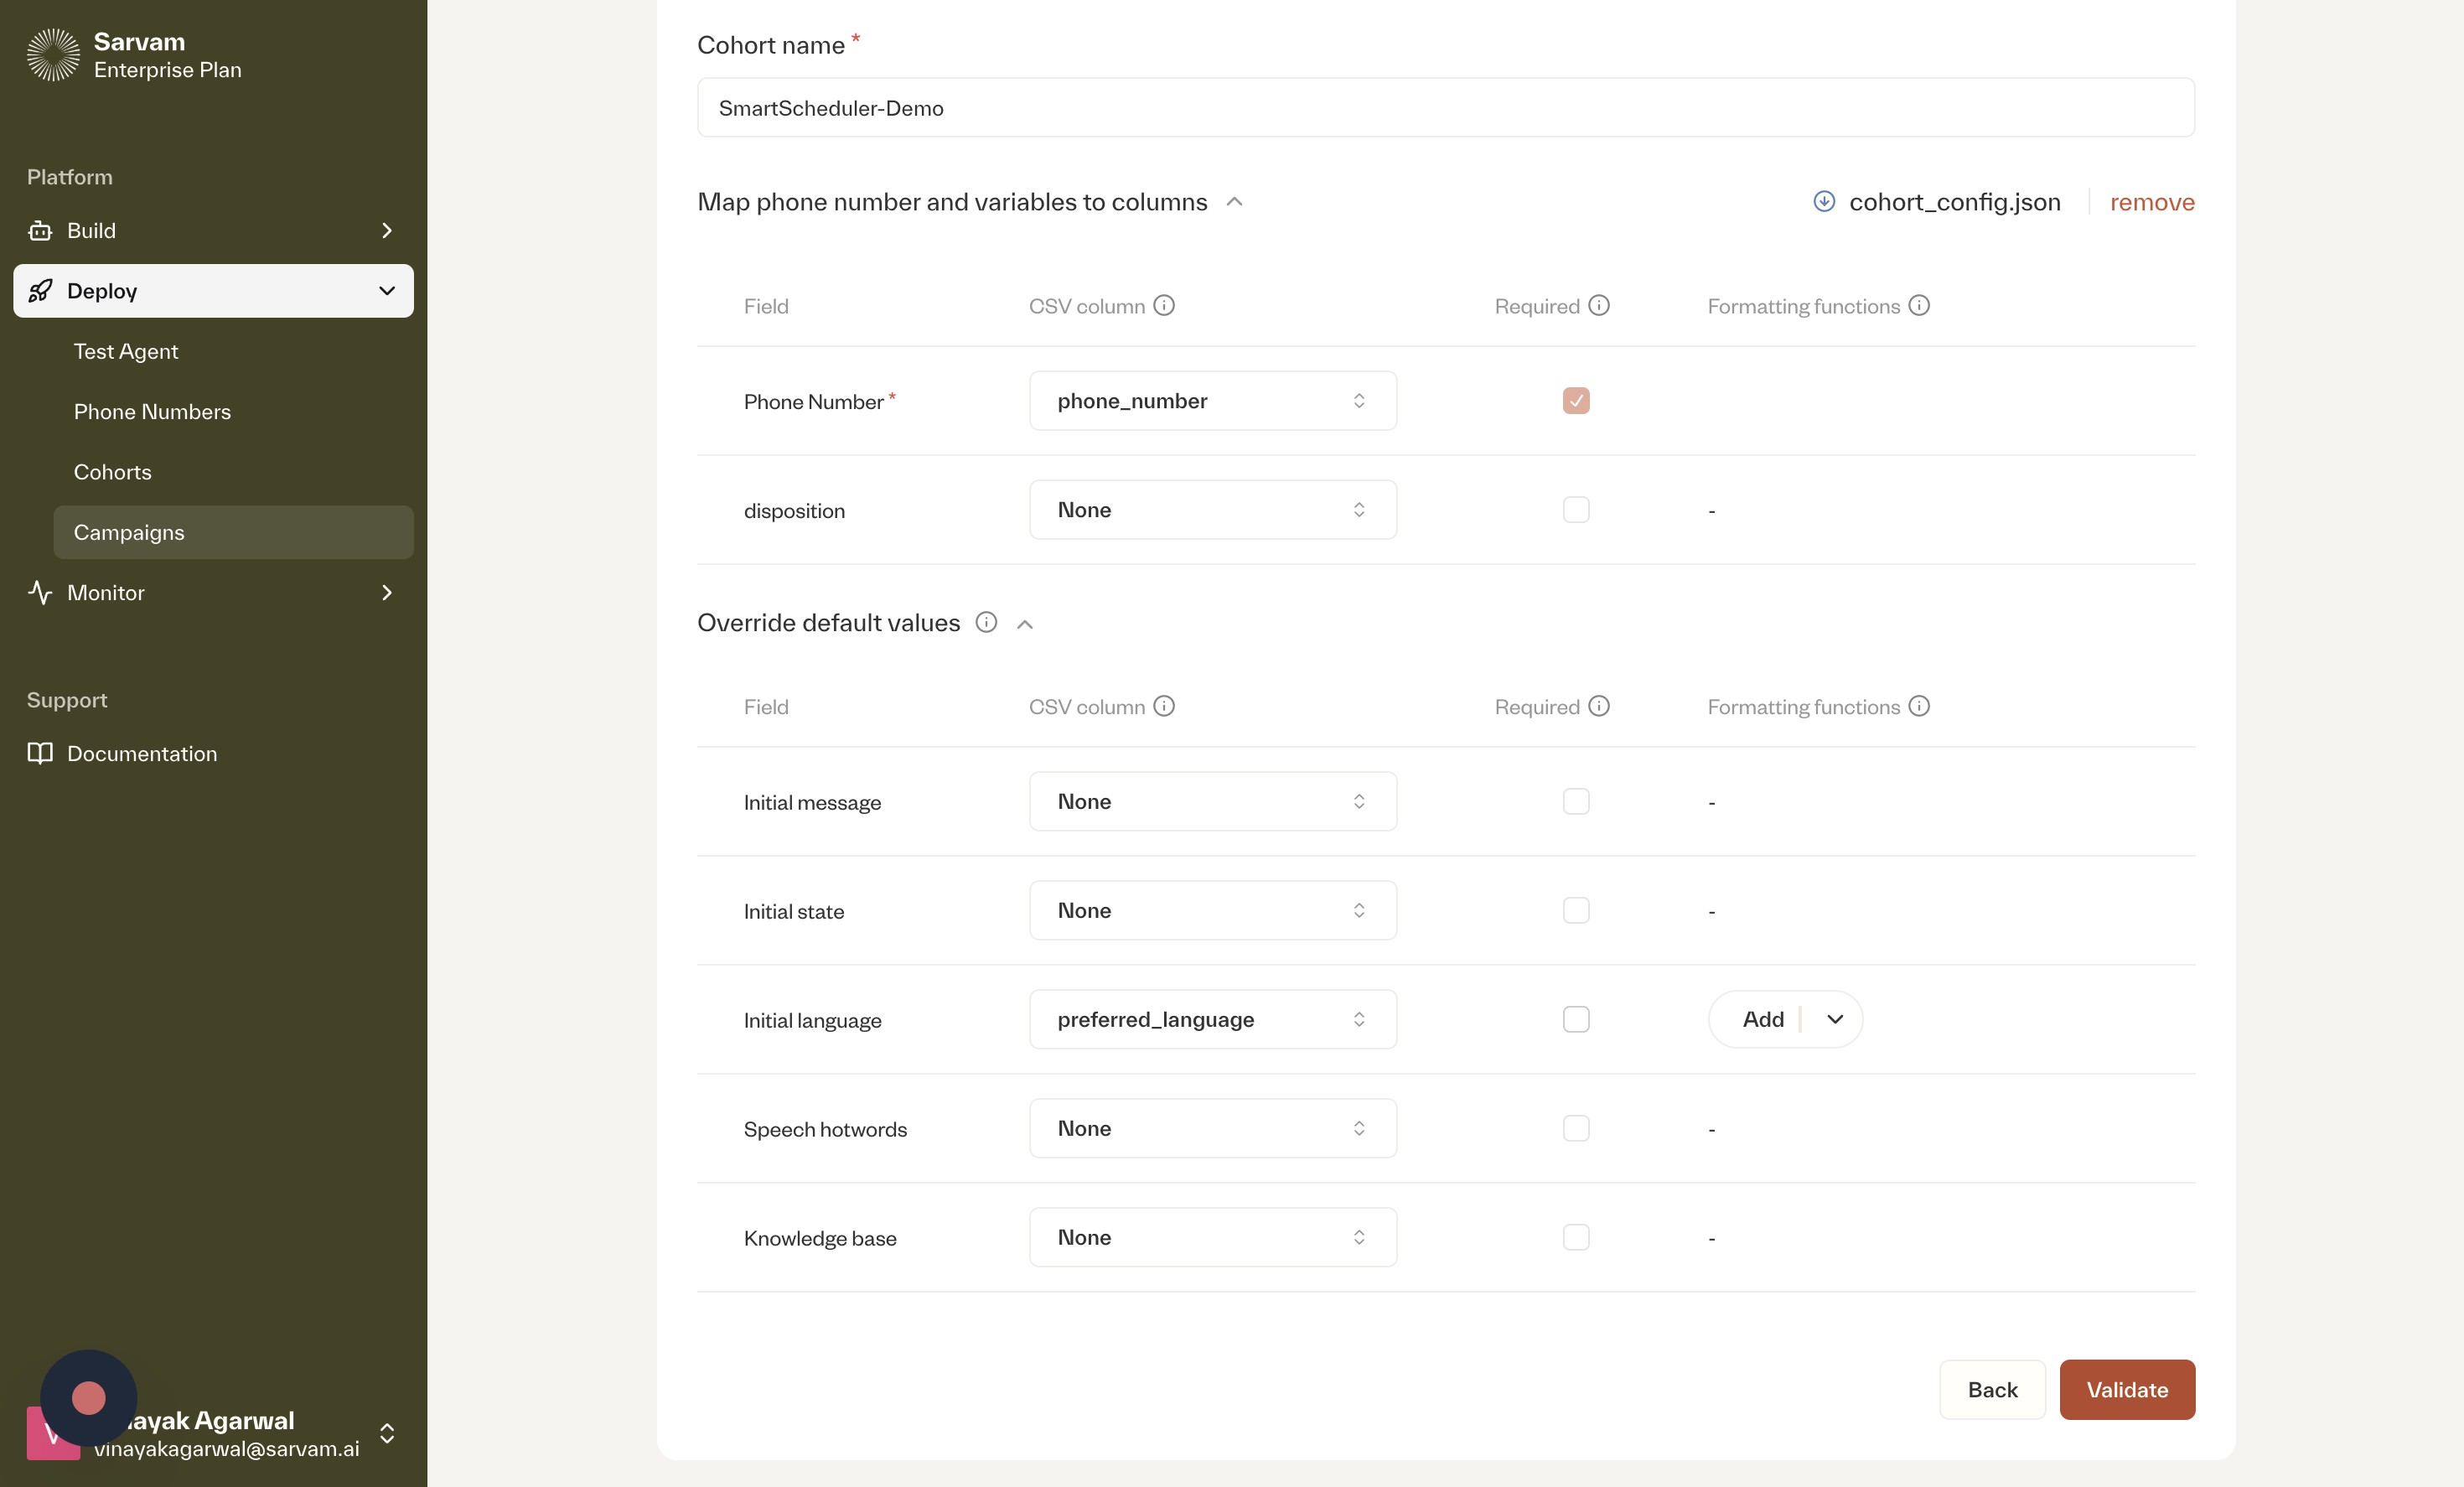
- Upload Cohort: Move to the “Cohort setup” tab. Upload your contact file in CSV format.
- Map Phone Number and Variables: It is essential to map the “Phone Number” field to the corresponding column in your CSV file. You can also map other columns and “Override default values” to customize the campaign for each contact, for example, by setting an “Initial language”.
Step 3: Configure Date and Time
This step allows you to define the schedule for your outbound campaign.
- Set Campaign Period: In the “Date and time” tab, you must select a “Start date time” and an “End date time” for the campaign to run.
- Define Calling Hours: Choose the “Allowed days” of the week for making calls and specify the time frame during which “Calls allowed between”.
Step 4: Configure Retry Logic
Configure the retry logic for calls that are not successful on the first attempt.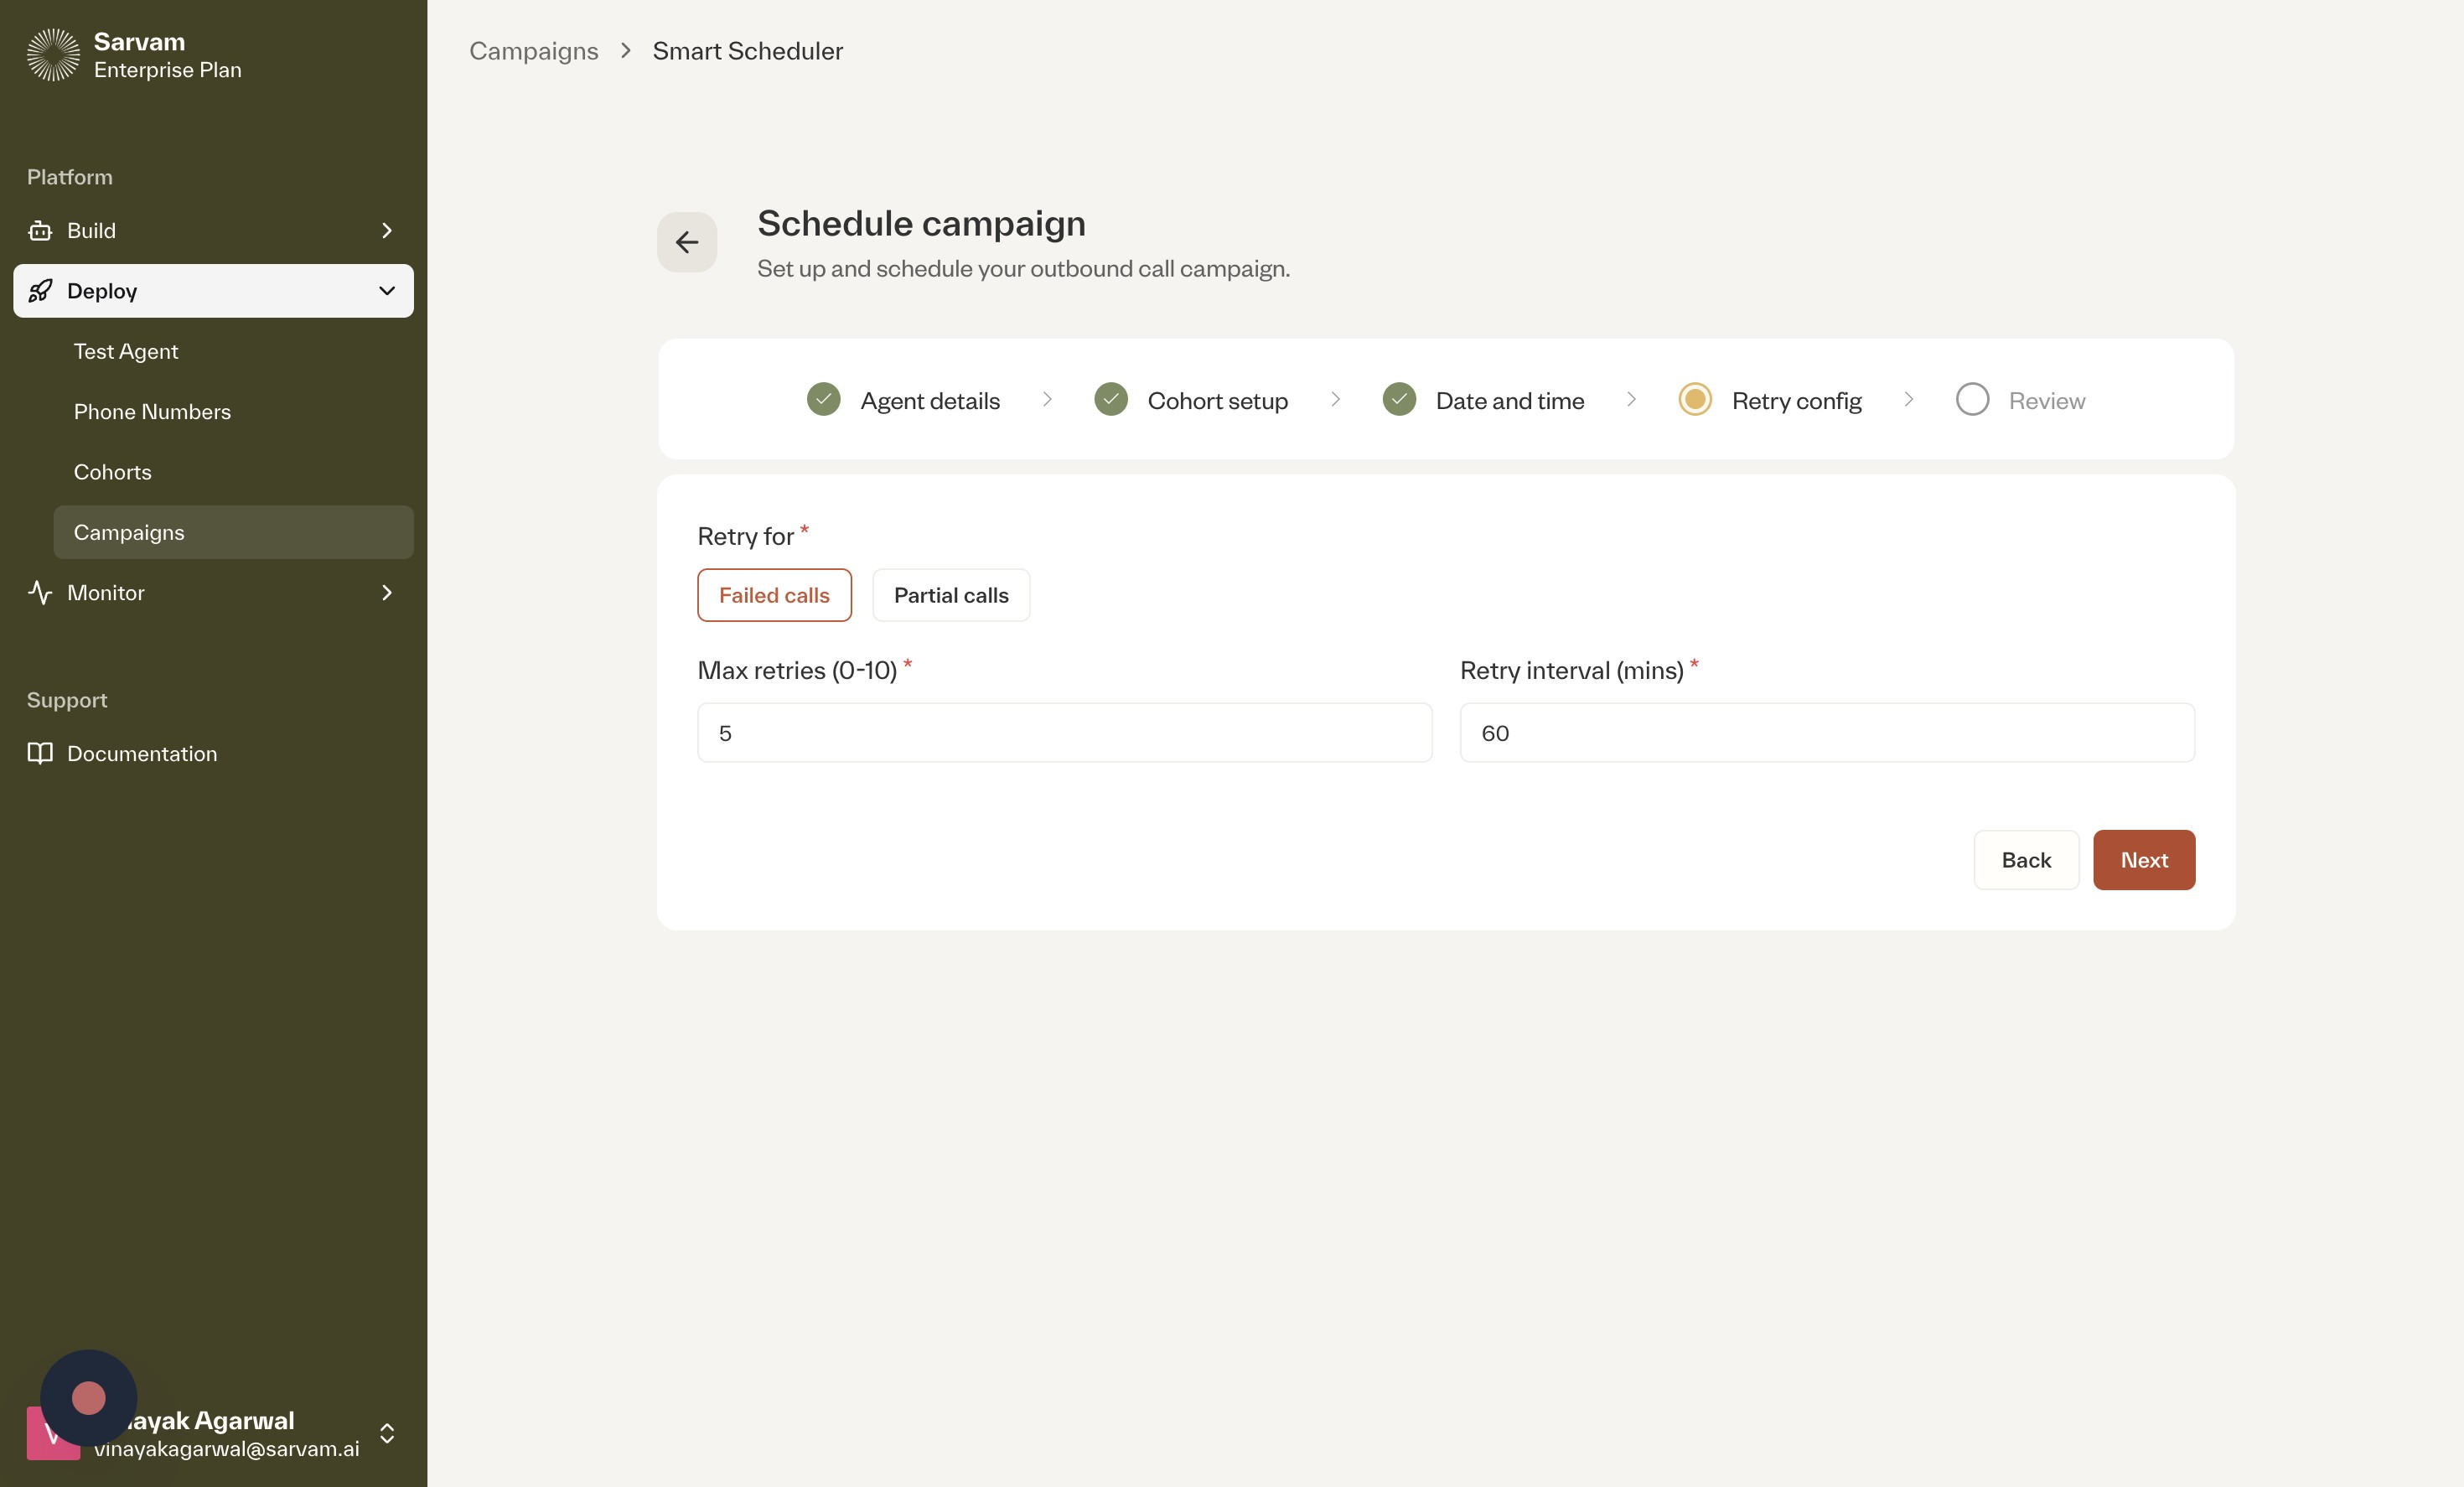
- Set Retry Conditions: Under the “Retry config” tab, specify the conditions for a retry (e.g., “Failed calls” or “Partial calls”).
- Define Retry Parameters: Set the “Max retries” and determine the “Retry interval (mins)”.
Step 5: Review and Launch
The final step is to review all the configured settings and launch the campaign.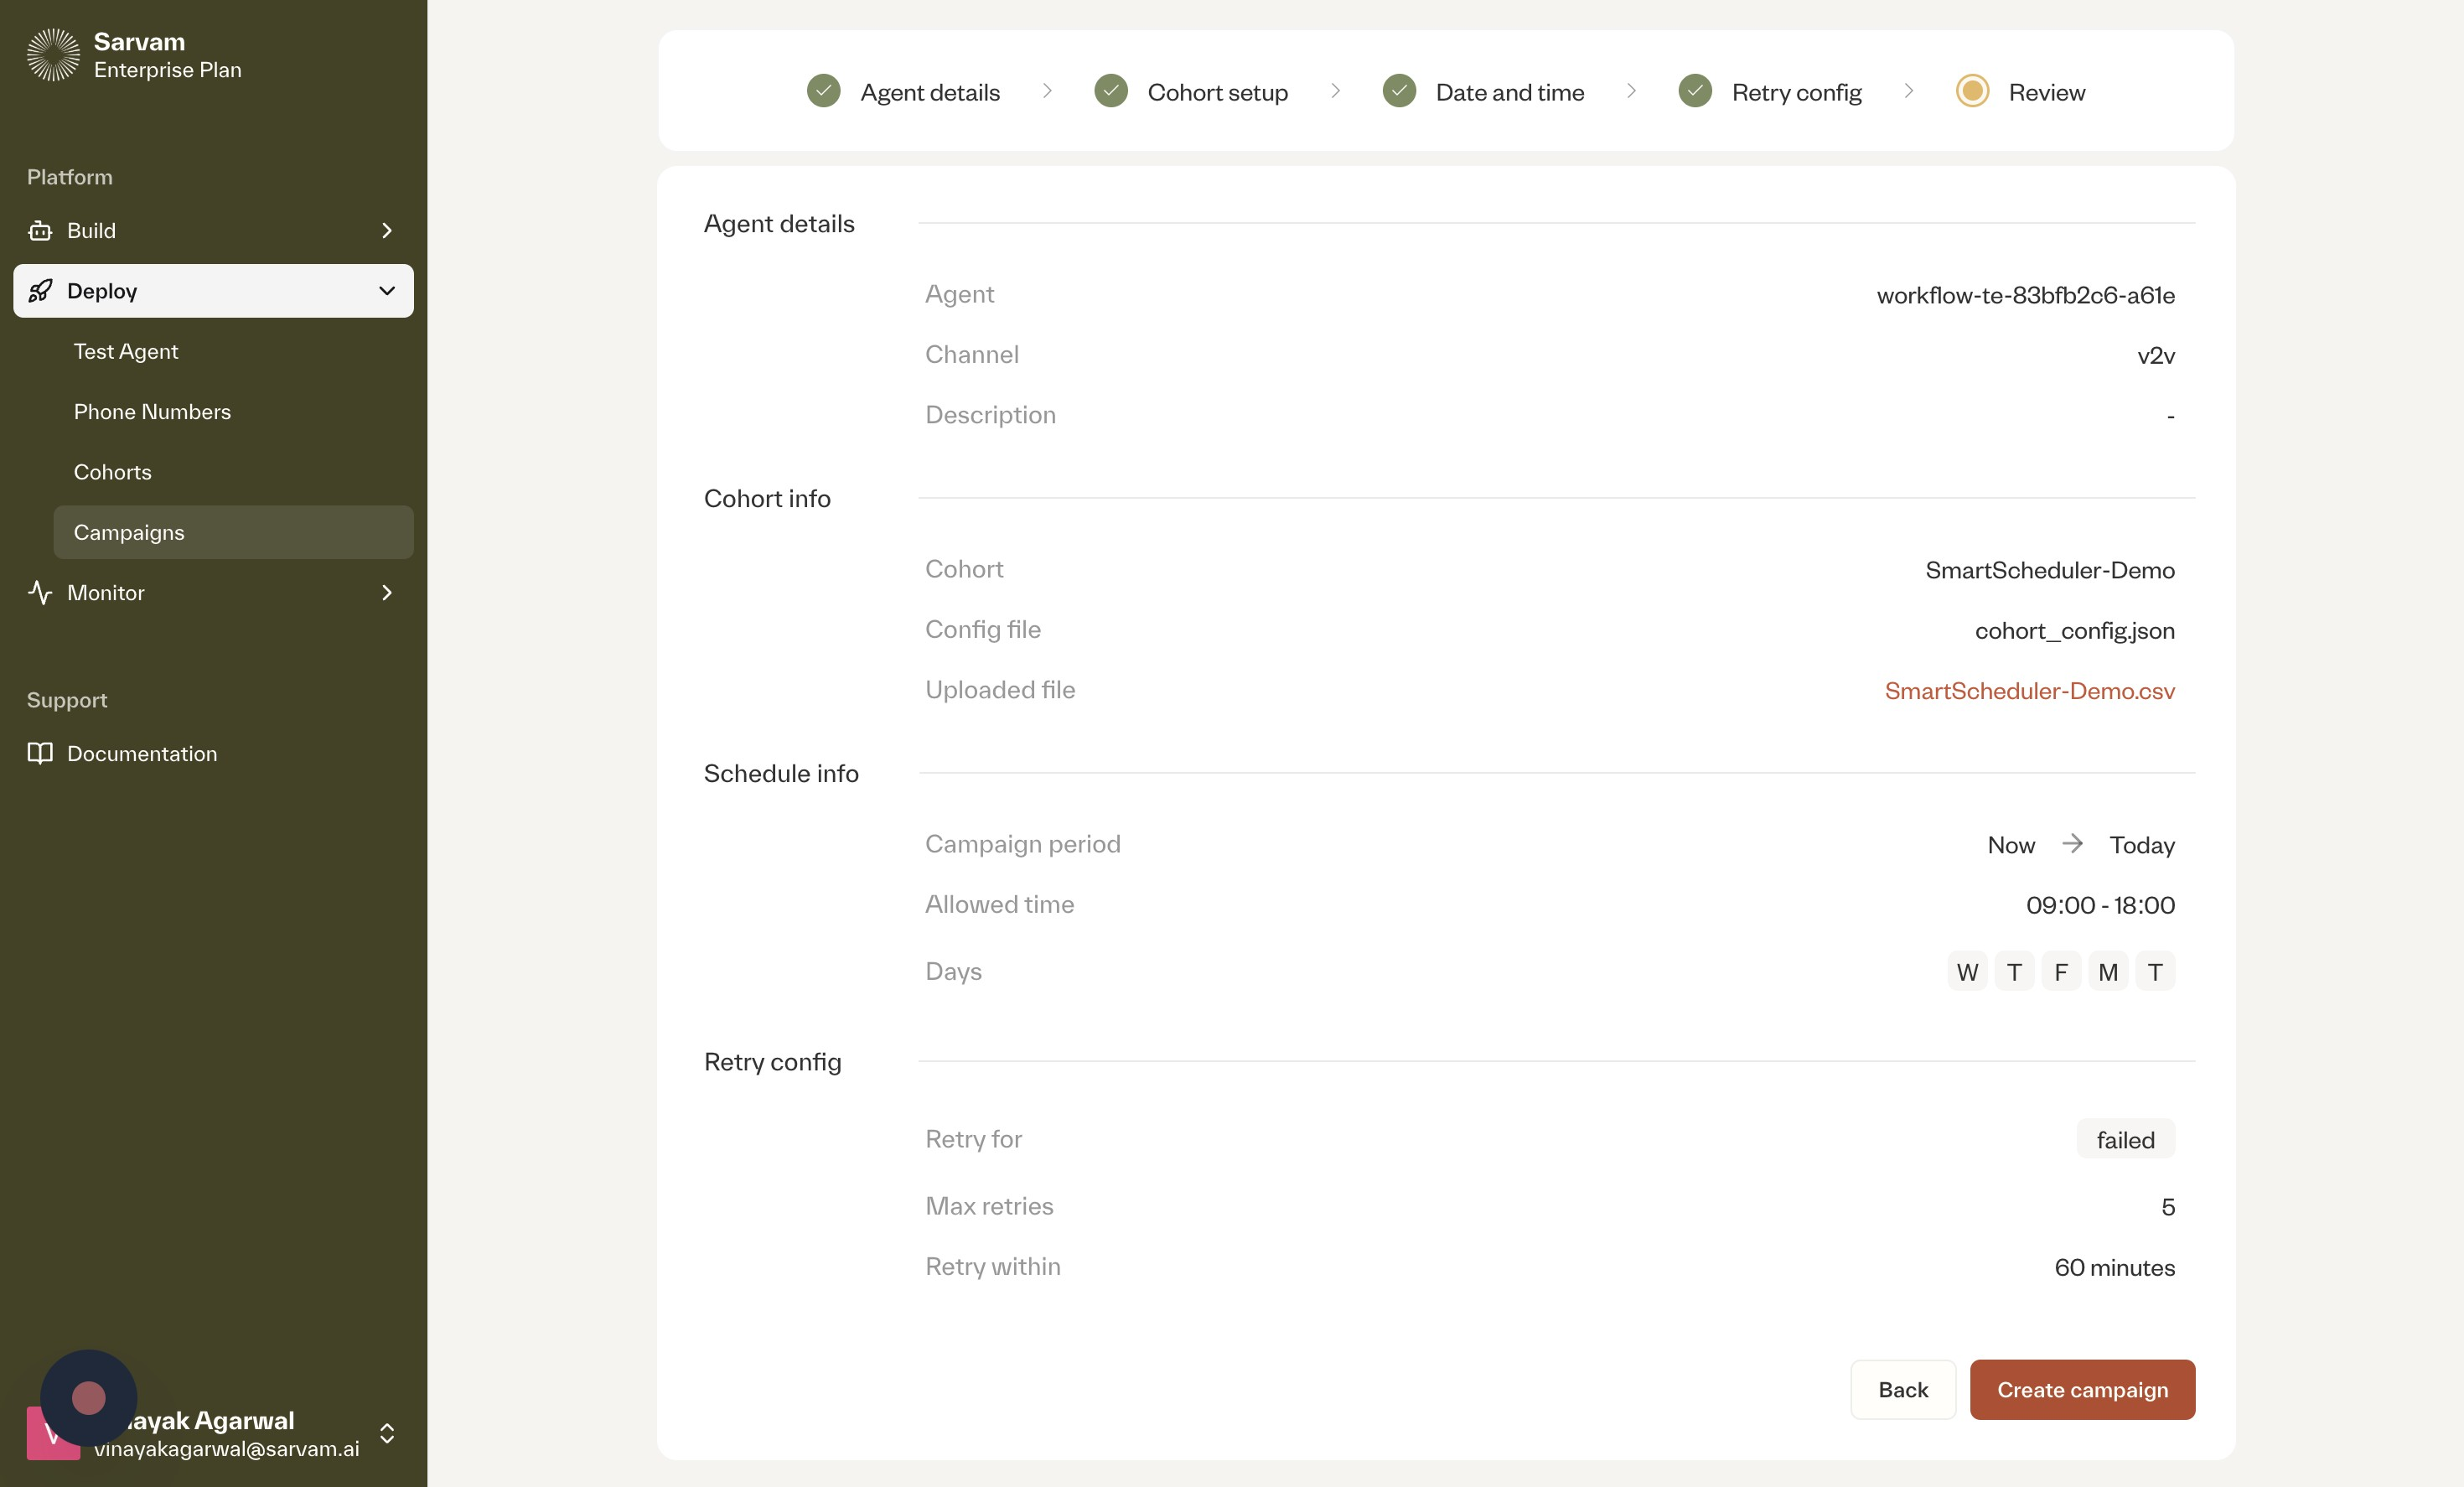
- Review Campaign Details: Navigate to the “Review” tab for a summary of your configurations.
- Launch the Campaign: After verifying that all details are correct, click the “Create campaign” button.